Hello Anna developers.
If this is your first time opening the Anna developer documentation, you will probably run into a long list of new terms very quickly: Anna App, Executa, Tool, Skill, Manifest, Host API, Runtime, Bundle, Agent Session… Each term may look manageable on its own, but together they raise one very practical question: where should I actually start?
This post is here to answer that question.
We will not start with a pile of abstract concepts, and we will not begin by hand-writing an overly simplified hello world. Instead, we will use the official example anna-app-llm-demo from the example repository as our main thread. We will start from environment setup, run a real Anna App locally, take it apart piece by piece, and then push it to the Anna platform.
This article will walk you through:
-
How to prepare your local development environment
-
How to log in to your Anna account so your local App can use real platform capabilities
-
How to run the official LLM Demo
-
What
app.json,manifest.json,bundle/, andexecutas/are responsible for in an Anna App project -
How the UI directly calls
anna.llm.complete(...) -
How the UI calls Anna LLM indirectly through an Executa
-
How to use
anna-app apps pushto push both the App and the bundled Tool to the platform
My goal is simple: after following this guide, someone who is new to Anna App development should be able to run their first real example and understand why it works, instead of just thinking, “It runs, but I have no idea what is happening.”
If you already know some frontend development and are comfortable with the command line, but are not yet familiar with the Anna App development model, this guide is for you.
Chapter 1: Prepare the Development Environment
Before developing an Anna App, you need at least three tools installed locally:
-
Node.js 22+: used to run
@anna-ai/cliand frontend development tooling. -
uv: used by Anna’s local development tools to start the Python runtime and Python Executas.
-
@anna-ai/cli: Anna’s official development CLI, which provides commands such as
anna-app init,anna-app dev, andanna-app validate.
I recommend installing Node.js through a Node version manager. This way, you do not need to manually choose different installers for macOS Intel, macOS Apple Silicon, Windows x64, or Windows ARM64.
macOS: Intel / Apple Silicon
If you already have Homebrew installed, install Node.js like this:
brew install fnm
echo 'eval "$(fnm env --use-on-cd --shell zsh)"' >> ~/.zshrc
source ~/.zshrc

fnm install 22
fnm default 22
node --version
npm --version
If you do not have Homebrew, you can use the install script instead:
curl -fsSL https://fnm.vercel.app/install | bash
source ~/.zshrc

fnm install 22
fnm default 22
node --version
npm --version
Install uv:
curl -LsSf https://astral.sh/uv/install.sh | sh
source ~/.zshrc
uv --version
Install the Anna CLI:
npm install -g @anna-ai/cli
anna-app --help
anna-app doctor
Windows: x64 / ARM64
Run this in PowerShell:
winget install Schniz.fnm
After installation, configure PowerShell to load fnm automatically when it starts:
if (-not (Test-Path $PROFILE)) { New-Item -ItemType File -Path $PROFILE -Force }
Add-Content -Path $PROFILE -Value 'fnm env --use-on-cd --shell powershell | Out-String | Invoke-Expression'
. $PROFILE
Then install Node.js 22:
fnm install 22
fnm default 22
node --version
npm --version
Install uv:
powershell -ExecutionPolicy ByPass -c "irm https://astral.sh/uv/install.ps1 | iex"
uv --version
Install the Anna CLI:
npm install -g @anna-ai/cli
anna-app --help
anna-app doctor
If PowerShell says it cannot find fnm, uv, or anna-app, close the terminal and reopen PowerShell before trying again. Many installers only refresh PATH in a new terminal session.
Linux: Optional
If you develop on Linux, you can use commands similar to macOS:
curl -fsSL https://fnm.vercel.app/install | bash
source ~/.bashrc

fnm install 22
fnm default 22

curl -LsSf https://astral.sh/uv/install.sh | sh
source ~/.bashrc

npm install -g @anna-ai/cli
anna-app doctor
Check That the Environment Is Ready
Finally, confirm that all of these commands produce normal output:
node --version
npm --version
uv --version
anna-app --help
anna-app doctor
For node --version, anything at v22.x or higher is fine. anna-app doctor is the most important check before Anna App development. If it reports an error, fix the environment according to its instructions before moving on to the next chapter.

Log In to Your Anna Account
The environment setup above is enough to start an Anna App locally. However, if you want to use real Anna platform capabilities during local debugging, such as LLM, Agent Session, real storage, image generation, and so on, you need to log in to your Anna account first.
After logging in to the Anna platform in your browser:

Run this command in your local CLI:
anna-app login --host https://anna.partners
After running it, the CLI will guide you through the login authorization flow. Once login succeeds, your machine will save a development access credential. Later, when anna-app dev needs to access platform capabilities, it can use this credential.
Open the web page highlighted in the red box in the image below:


Click accept. After the flow succeeds as shown above, the CLI should display:
✓ logged in. PAT saved to ~/.config/anna/credentials.json
  expires in ~90d
You can confirm your current login status with:
anna-app whoami

If you need to log out later, run:
anna-app logout --host https://anna.partners
Chapter Summary
In this chapter, we completed the basic setup required before Anna App development:
-
Installed Node.js 22+, which is used to run the Anna CLI and frontend tooling.
-
Installed
uv, which is used to start the local Python runtime and Python Executas. -
Installed
@anna-ai/cli, which provides theanna-appcommand we will use throughout the rest of this guide. -
Used
anna-app doctorto check the local development environment. -
Used
anna-app login --host https://anna.partnersto log in to an Anna account, so the local development environment can call real platform capabilities.
At this point, your machine has the basic requirements for developing and running Anna Apps. In the next chapter, we will enter the official example anna-app-llm-demo and run a real Anna App locally.
Chapter 2: Run the Official LLM Demo
Starting from this chapter, we will use the official example anna-app-llm-demo as our main case study.
In this chapter, we will first get the example running. In later chapters, we will gradually break down its directory structure, manifest permissions, frontend calls, and Executa implementation.
Enter the Example Directory
If you are already in the root directory of the anna-executa-examples repository, run:
cd examples/anna-app-llm-demo
If you do not have the repository yet, clone it first:
git clone https://github.com/whtcjdtc2007/anna-executa-examples.git
cd anna-executa-examples/examples/anna-app-llm-demo
All following commands should be run inside examples/anna-app-llm-demo.
Confirm That You Are Logged In to Anna
This example directly uses the real LLM capability from the Anna platform, so you need to be logged in first:
anna-app login --host https://anna.partners
If you have already logged in, confirm with:
anna-app whoami
As long as you can see the current account information, you can continue.
Validate the Example Configuration
First run:
anna-app validate --strict
If you see:
✓ validate passed
it means this example’s manifest.json, UI bundle, Host API permissions, and bundled Executa references all passed the local checks.
We use --strict here so the CLI also checks whether the Host APIs used by the frontend code match the declarations in manifest.json under ui.host_api.

Start the Local Development Environment
Run:
anna-app dev
The CLI will start the local Anna App harness and connect it to real Anna platform capabilities.
You may occasionally see a timeout error due to network conditions:
✗ bridge failed to start: python bridge did not signal ready in 8sIf this happens, run
anna-app devagain.
The terminal will print the local URL:

http://localhost:5180/
Copy it into your browser and open it.

If the Port Is Already in Use
The default port is usually 5180. If the port is already in use, choose another port:
anna-app dev --port 5181
Then open the new URL printed in the terminal.
What You Should See
After opening the page, you should see the LLM Demo debugging interface. This page provides two ways to call the LLM:
-
Direct / Host API: the frontend UI directly calls
anna.llm.complete(...) -
Via Executa: the frontend UI calls
anna.tools.invoke(...), and then the Python Executa requests Anna LLM through reverse RPC
You can start with the Direct path: enter a prompt and run completion. After confirming that the model returns a result, switch to the Via Executa path and observe how the same LLM request is completed indirectly through a Tool.
Both paths use the LLM capability hosted by the Anna platform. Neither your App nor your Executa needs to store any model API key.

The LLM Uses the Default Model
One important detail: after you start an LLM conversation, the model used is the default model selected in the Anna account logged in through the CLI.
You can configure it here:
- Open the LLM configuration page

- Select the default LLM

Chapter Summary
In this chapter, we ran the official LLM Demo locally:
-
Entered the
examples/anna-app-llm-demoexample directory. -
Confirmed that the current CLI is logged in to an Anna account.
-
Used
anna-app validate --strictto validatemanifest.json, the UI bundle, and the Host API configuration. -
Used
anna-app devto start the local Anna App harness. -
Opened the LLM Demo page in the browser and learned about its two LLM call paths:
-
Direct / Host API: the frontend directly callsanna.llm.complete(...) -
Via Executa: the frontend callsanna.tools.invoke(...), and then the Python Executa requests Anna LLM
-
-
Learned that the LLM Demo uses the default model configured in the current Anna account.
At this point, the example is running. In the next chapter, we will break down the project structure and understand what app.json, manifest.json, bundle/, and executas/ are each responsible for.
Chapter 3: Break Down the LLM Demo Project Structure
In the previous chapter, we entered and ran:
examples/anna-app-llm-demo
This chapter explains the structure of the example: which files describe App information, which files define runtime permissions, which files make up the UI, and which files belong to the bundled Executa.
The core structure of the project is:
anna-app-llm-demo/
├── app.json
├── manifest.json
├── bundle/
│   ├── index.html
│   ├── app.js
│   ├── style.css
│   └── anna-tool-ids.js
├── executas/
│   └── llm-via-executa-python/
│       ├── executa.json
│       ├── pyproject.toml
│       ├── llm_via_executa_plugin.py
│       └── uv.lock
├── fixtures/
│   └── happy-path.jsonl
├── package.json
└── pnpm-lock.yaml
You can first think of it as five parts:
| Part | Purpose |
|---|---|
| app.json | Describes what this App is and which Executas it bundles |
| manifest.json | Describes what permissions the App needs at runtime, where the UI is, and which Host APIs it can call |
| bundle/ | The App frontend UI, which runs inside Anna’s iframe |
| executas/ | Tool capabilities bundled with the App; here it is a Python Executa |
| fixtures/ | Data for local mocking / replay |
app.json: What This App Is
First, look at app.json. It describes the App’s product information and bundling relationships.
It contains fields like these:
{
  "slug": "llm-demo",
  "name": "LLM Demo",
  "version": "0.1.0",
  "tagline": "Run an LLM completion directly or through a bundled Executa.",
  "category": "developer-tools",
  "pricing_model": "free"
}
Field by field:
| Field | Meaning |
|---|---|
| slug | A short identifier for the App, used when publishing and referencing it |
| name | The display name of the App |
| version | The current App version |
| tagline | A one-line introduction |
| description | A fuller App description |
| category | The App category |
| pricing_model | The pricing model; here it is free |
These fields are closer to “store information” and “product information”. They are not UI permissions, and they are not Tool startup configuration.
After the App is distributed with anna-app apps push, these fields are automatically filled into the web form.
The most important part of this file is:
"bundled_executas": {
  "llm-via-executa": { "path": "./executas/llm-via-executa-python" }
}
This means the App bundles an Executa whose handle is:
llm-via-executa
Its code directory is:
./executas/llm-via-executa-python
Later, in manifest.json, you will see:
"tool_id": "bundled:llm-via-executa"
Here, bundled:llm-via-executa is not the final real tool id. It is a handle that is resolved during local development or publishing.
You can understand it like this:
app.json tells Anna:
"This App comes with an Executa called llm-via-executa, and it lives in this directory."
manifest.json: What This App Can Do at Runtime
manifest.json is the most important runtime configuration file. It describes what capabilities this version of the App needs when it runs.
It starts with:
{
  "schema": 2
}
schema: 2 means this is an Anna App with a UI runtime. In other words, it is not just a capability package mentioned in chat; it also includes an iframe UI that can be opened.
permissions: Coarse-Grained Capability Declarations
In this example:
"permissions": [
  "chat.write_message",
  "tools.invoke"
]
This declares that the App needs two categories of capability:
| permission | Meaning |
|---|---|
| chat.write_message | The App can write messages into the chat |
| tools.invoke | The App can call Tools from the UI |
Note: permissions is a coarse-grained declaration. It is not the detailed API method table. The exact methods the iframe can call are defined later in ui.host_api.
required_executas: Which Executa This App Depends On
The LLM Demo depends on one bundled Executa:
"required_executas": [
  {
    "tool_id": "bundled:llm-via-executa",
    "min_version": "0.1.0",
    "version": "latest"
  }
]
Field meanings:
| Field | Meaning |
|---|---|
| tool_id | The dependent Executa. Here, bundled:llm-via-executa references the bundled handle in app.json |
| min_version | The minimum required version |
| version | Which version to use. latest means the latest current version at publishing time |
This section means:
This App requires the bundled Tool llm-via-executa.
It corresponds to this section in app.json:
"bundled_executas": {
  "llm-via-executa": { "path": "./executas/llm-via-executa-python" }
}
These two places must match.
system_prompt_addendum: Extra Instructions for Anna When the App Is Active
The example includes:
"system_prompt_addendum": "The user has the LLM Demo app open..."
Its purpose is this: when the user uses the App, Anna receives an additional system prompt so it understands what the App does, what capabilities it has, and how to interpret the current UI.
This is not frontend code, and it is not Tool code. It is context for the Anna model.
For the LLM Demo, this prompt tells Anna:
-
The user has opened the LLM Demo
-
The App can call
anna.llm.completedirectly -
The App can also call the LLM indirectly through a bundled Executa
-
The App also includes agent session capabilities
ui.bundle: Where the UI Entry Point Is
In manifest.json, there is:
"ui": {
  "bundle": {
    "format": "static-spa",
    "entry": "index.html",
    "external_origins": []
  }
}
This means the UI is a static single-page application:
| Field | Meaning |
|---|---|
| format | Currently static-spa, meaning a static frontend bundle |
| entry | The UI entry file, here bundle/index.html |
| external_origins | External origins the UI is allowed to access; empty here |
So when Anna opens this App UI, it starts loading from:
bundle/index.html
ui.views: Which Windows This App Has
The example has only one view:
"views": [
  {
    "name": "main",
    "title": "LLM Demo",
    "default": true,
    "entry": "index.html",
    "min_size": { "w": 460, "h": 600 },
    "default_size": { "w": 600, "h": 780 },
    "resizable": true,
    "movable": true,
    "single_instance": true
  }
]
Field explanations:
| Field | Meaning |
|---|---|
| name | The internal name of this window |
| title | The window title |
| default | Whether this is the default view to open |
| entry | Which entry file this view uses |
| min_size | The minimum window size |
| default_size | The default window size |
| resizable | Whether the user can resize the window |
| movable | Whether the user can move the window |
| single_instance | Whether only one instance is allowed |
single_instance: true means that if the same user opens this view again in the same context, Anna will prefer to reuse the existing window instead of repeatedly opening new windows.
Important: ui.host_api: Which Anna APIs the iframe Can Actually Call
This is the most important permission area in manifest.json:
"host_api": {
  "llm": ["complete"],
  "chat": ["write_message"],
  "window": ["set_title"],
  "agent": {
    "session": { "auto": true },
    "tools": []
  }
}
It controls which anna.* APIs the frontend code in bundle/app.js can call.
Field by field:
-
"llm": ["complete"]: the UI can callanna.llm.complete(...). This is the LLM Demo’s first path: the UI directly requests Anna Host LLM. -
"chat": ["write_message"]: the UI can call chat write capabilities. -
"window": ["set_title"]: the UI can set the window title. -
"agent": {"session":{"auto":true},"tools":[]}: the App can create an agent session. We will not go deep into session usage here.
You must declare the anna.* APIs you need to call here as required; otherwise, those APIs cannot be called at runtime.
bundle/index.html: The HTML Entry Point for the iframe
Now look at bundle/.
bundle/index.html is the UI entry file. It loads the page structure, styles, and scripts.
The key part is:
<link rel="stylesheet" href="style.css" />
This loads the stylesheet:
bundle/style.css
Then it loads two scripts:
<script src="anna-tool-ids.js"></script>
<script src="app.js" type="module"></script>
The order matters.
anna-tool-ids.js first sets the mapping from bundled handles to real tool ids.
app.js then reads that mapping and runs the actual frontend logic.
bundle/anna-tool-ids.js: Mapping Bundled Handles to Tool IDs
You do not need to manually modify or create this file. It is generated automatically by the anna-app apps push workflow.
It maps:
llm-via-executa
to the actual callable tool id in the current environment.
The frontend code does not hard-code the final production tool id. Instead, it uses this mapping to find the id for the current environment.
This matters because:
During local development, it may be a dev/test tool id.
After publishing, it is the official tool id minted by the platform.
But the frontend code can keep the same logic.
bundle/app.js: Frontend Runtime Logic
bundle/app.js is the frontend core of this App.
At the beginning, it imports the Anna App Runtime:
import { AnnaAppRuntime } from "/static/anna-apps/_sdk/latest/index.js";
Then it connects to the Anna host environment:
const anna = await AnnaAppRuntime.connect();
After the connection succeeds, the frontend can use Host APIs such as anna.llm, anna.tools, and anna.agent.
The most important part of this file is the two LLM paths.
First path: call the LLM directly.
return anna.llm.complete(req);
The path is:
UI -> anna.llm.complete -> Anna Host LLM
Second path: call the LLM through Executa.
return anna.tools.invoke({
  tool_id: EXECUTA_TOOL_ID,
  method: EXECUTA_METHOD,
  args
});
The path is:
UI -> anna.tools.invoke -> llm-via-executa-python -> sampling/createMessage -> Anna Host LLM
This is the core value of the LLM Demo: the same App shows two ways to access the LLM.
executas/llm-via-executa-python/executa.json
Now look at the bundled Executa.
executa.json describes the Executa itself:
{
  "slug": "llm-via-executa",
  "name": "LLM via Executa",
  "version": "0.1.0",
  "executa_type": "tool",
  "tool_id": "tool-test-llm-via-executa-12345678",
  "type": "python",
  "enabled": true
}
Field explanations:
| Field | Meaning |
|---|---|
| slug | A short identifier for the Executa |
| name | The display name of the Executa |
| version | The Executa version |
| executa_type | Here it is tool, meaning this is an executable Tool |
| tool_id | The tool id used for local development / testing |
| type | The runtime type; here it is Python |
| enabled | Whether it is enabled in anna-app dev |
This file also contains distribution, which describes how the Tool is distributed after publishing. These fields are not required for beginners to understand deeply at this stage. For local development, focus mainly on tool_id, type, and enabled.
pyproject.toml: Tell uv How to Start the Python Tool
The most important part of pyproject.toml is:
[project]
name = "tool-test-llm-via-executa-12345678"
and:
[project.scripts]
"tool-test-llm-via-executa-12345678" = "llm_via_executa_plugin:main"
The script name must match the tool_id.
In other words, after anna-app dev discovers that this Executa is a Python type, it starts the corresponding Python entrypoint through uv, eventually entering:
llm_via_executa_plugin:main
That entrypoint lives in:
llm_via_executa_plugin.py
llm_via_executa_plugin.py: The Actual Executa Tool
This Python file implements a Tool using JSON-RPC over stdio.
Its core manifest contains:
"host_capabilities": ["llm.sample", "llm.agent.auto"]
This means the Executa is not only called by the UI; it can also request Host capabilities in the reverse direction.
The capabilities are:
| capability | Meaning |
|---|---|
| llm.sample | Allows the Executa to request Host LLM sampling through reverse RPC |
| llm.agent.auto | Allows the Executa to use agent session related capabilities |
Then it declares several Tool methods:
"tools": [
  { "name": "complete" },
  { "name": "sample_chain" },
  { "name": "agent_session" }
]
At the beginner stage, focus on complete:
UI calls method: "complete"
  |
  v
Python Tool receives invoke
  |
  v
Tool calls sampling/createMessage
  |
  v
Host LLM returns result
  |
  v
Tool returns the result to the UI
This is the second LLM call path.
fixtures/
fixtures/happy-path.jsonl is local mock data.
If you run in mock mode:
anna-app dev --mock-llm fixtures/happy-path.jsonl
the local harness can use the fixture to simulate LLM responses.
However, this guide uses the real Anna platform LLM as the main path, so we will not expand on this file here.
Chapter Summary
You can now understand the whole LLM Demo as this structure:
app.json
  Describes what the App is and where the bundled Executa lives

manifest.json
  Describes what permissions the App needs at runtime, where the UI loads from, and which Host APIs the iframe can call

bundle/
  The frontend UI the user sees, responsible for calling anna.llm.complete or anna.tools.invoke

executas/llm-via-executa-python/
  The Python Tool bundled with the App, responsible for indirectly requesting Host LLM through sampling/createMessage

fixtures/
  Data for local mock / replay
This App has two core LLM call paths:
Path 1: Direct
bundle/app.js -> anna.llm.complete(...) -> Anna Host LLM
Path 2: Via Executa
bundle/app.js -> anna.tools.invoke(...)
              -> llm_via_executa_plugin.py
              -> sampling/createMessage
              -> Anna Host LLM
Chapter 4: Push the LLM Demo to the Anna Platform
In the previous chapters, we ran anna-app-llm-demo locally. Local running is suitable for development and debugging, but if you want the Anna platform to recognize this App, install it, test it, and eventually publish it, you need to push the local project to Anna.
In this chapter, we use the officially recommended push workflow:
anna-app apps push
It completes most of the distribution work for us, so we do not need to manually configure everything page by page on the platform.
Confirm the Current Directory and Login Status
Enter the LLM Demo directory:
cd examples/anna-app-llm-demo
Confirm that you are logged in to Anna:
anna-app whoami
If you are not logged in yet, run:
anna-app login --host https://anna.partners
Then push:
anna-app apps push
2. What apps push Does
After running it, you will see output roughly like this:

using PAT from credentials (host=https://anna.partners)
  registering bundled executa "llm-via-executa" (./executas/llm-via-executa-python) [no-freeze]…
  ✓ bundled:llm-via-executa → tool-youming-llm-via-executa-yv49p6ce (v0.1.0, unchanged)
  wrote bundle/anna-tool-ids.js
  staging working bundle: 4 files, 35.7 KB
  ✓ working bundle staged (4 files, status=ready)
✓ apps/llm-demo: working draft updated (rev 1)
  first push — wrote .anna/app.json
  ✓ working bundle: 4 files, 35.7 KB → ready
status: draft
Two things are happening in this output:
-
It pushes and registers the backend Executa Tool.
-
It pushes the App’s frontend UI bundle and manifest, creating a working draft.
In other words, apps push handles both backend and frontend distribution dimensions.
Dimension 1: Backend Executa Tool Distribution
The backend Tool of the LLM Demo is located at:
executas/llm-via-executa-python/
It is declared as a bundled Executa in app.json:
"bundled_executas": {
  "llm-via-executa": {
    "path": "./executas/llm-via-executa-python"
  }
}
When you run anna-app apps push, the CLI first registers this bundled Executa:
registering bundled executa "llm-via-executa" (./executas/llm-via-executa-python)
After registration, the platform assigns it an official tool_id:
bundled:llm-via-executa → tool-youming-llm-via-executa-yv49p6ce
Pay attention to the difference:
bundled:llm-via-executa
is the logical handle used locally in manifest.json.
tool-youming-llm-via-executa-yv49p6ce
is the real Tool ID assigned by the Anna platform.
Why bundle/anna-tool-ids.js Gets Updated
During the push, you will also see:
wrote bundle/anna-tool-ids.js
This happens because the frontend UI needs to know the real tool_id before it can call the Tool.
The local code does not directly hard-code:
tool-youming-llm-via-executa-yv49p6ce
Instead, it uses bundle/anna-tool-ids.js as a mapping:
window.__ANNA_TOOL_IDS__ = {
  "llm-via-executa": "tool-youming-llm-via-executa-yv49p6ce"
}
This way, the frontend only needs to remember the bundled handle:
llm-via-executa
At runtime, it resolves that handle into the real tool_id for the current environment.
This is also why bundle/index.html first loads:
<script src="anna-tool-ids.js"></script>
and then loads:
<script src="app.js" type="module"></script>
because app.js needs to read this mapping.
View the Tool on the Platform
After the push completes, you can view this Tool on the Anna web page.
The path is:
More → Advanced → Executa → My Tools


Here you can see the Tool that was just registered, for example:
LLM via Executa
Its real Tool ID will look similar to:
tool-youming-llm-via-executa-yv49p6ce
Click Edit on the Tool card to view and edit its details, including:
-
Name
-
Description
-
Visibility
-
Distribution method
-
Download URL
-
Executable file name
-
Multi-platform binary URLs

Local Debug Distribution for the Tool: Local

The Executa Tool pushed through anna-app apps push has a Local distribution method configured. This means that on your platform, Anna already knows how to start this Tool.
Click More → Agents to view Agents:

Click Details, and you can see that our LLM via Executa has already started:


Recommended Tool Distribution Method: Binary
However, if you need to distribute the Tool to other users, the recommended method is Binary distribution: package the Tool as binary files and distribute those binaries.
In the Tool’s Distribution section, you can choose the distribution method.
For real users, the recommended option is:
Binary
This means packaging the Tool into binaries for different platforms, so the Anna Agent can automatically download and install the correct one for the user’s system.

Common platforms include:
-
macOS x86_64
-
macOS ARM64
-
Windows x64
-
Windows ARM64
-
Linux x86_64
Binary distribution requires download URLs, for example:
https://example.com/tool-darwin-arm64.tar.gz
In real projects, I do not recommend packaging these files manually. It is better to use GitHub Actions or a similar CI workflow:
push tag
  |
  v
CI builds multi-platform binaries
  |
  v
Upload to GitHub Release
  |
  v
Fill in release asset URLs in Tool Distribution
This is part of release engineering, so this beginner guide will not go deep into it. For now, you only need to know this: apps push first registers the bundled Executa as an independent Tool, and that Tool has its own independent distribution configuration.
Dimension 2: App Frontend and Manifest Distribution
After apps push finishes processing the bundled Executa, it continues processing the App itself:
staging working bundle: 4 files, 35.7 KB
✓ working bundle staged (4 files, status=ready)
✓ apps/llm-demo: working draft updated (rev 1)
Here, the bundle refers to:
bundle/
├── index.html
├── app.js
├── style.css
└── anna-tool-ids.js
In other words, the CLI uploads the frontend UI files to the platform and combines them with manifest.json to create a working draft.
You can think of the working draft as: the current draft version being edited and tested
It is not yet an official release version, and it is not a version users can see in the App Store.
View the App in Developer Console
After the push completes, you can view the App on the web page.
The path is:
More → Developer
You will see the App that was just pushed, for example:
LLM Demo

Click Edit to enter the App details page.
On the details page, you can see several tabs:
-
Listing
-
Executas
-
UI Runtime
-
Versions
-
Settings

The Listing tab contains the display information for this App, matching the fields in the local app.json.
Focus on: Versions

On the Versions page, you will see a working draft.
This means:
-
The App draft has been pushed to the platform.
-
The UI bundle has been uploaded.
-
But no official version has been cut yet.
Working Draft, Cut Version, and Publish
There are three stages to distinguish here.
| Stage | Command / Action | Meaning |
|---|---|---|
| Working draft | anna-app apps push | Update the testable working draft |
| Immutable version | anna-app apps cut 0.1.0, or click Cut version on the page | Freeze the current draft into an immutable version |
| Published App | Submit for review and publish on the page | Users can install and use it |
apps push is not the same as publishing. It only pushes the current local state to the platform draft so you can install and test it.
After you confirm that the draft works, you can cut a version:
anna-app apps cut 0.1.0
Or click this button on the Versions page in Developer Console:
Cut version...
After cutting a version, it will appear in Version history.

Install the App and Configure Permissions
After cutting a version, go back to the developer page and click install to install it on the platform:

Then open the Installed Apps page to view the installed App:

If this App needs platform capabilities, such as:
-
LLM completion
-
Agent sessions
you can enable the corresponding permissions in the Installed Apps permission panel.

The image above shows the permission configuration panel in Installed Apps. For the LLM Demo, common permissions include:
-
LLM completion
-
Agent sessions
-
Allow agent sessions to use user tools
These permissions determine which platform capabilities the App can call in a real environment.
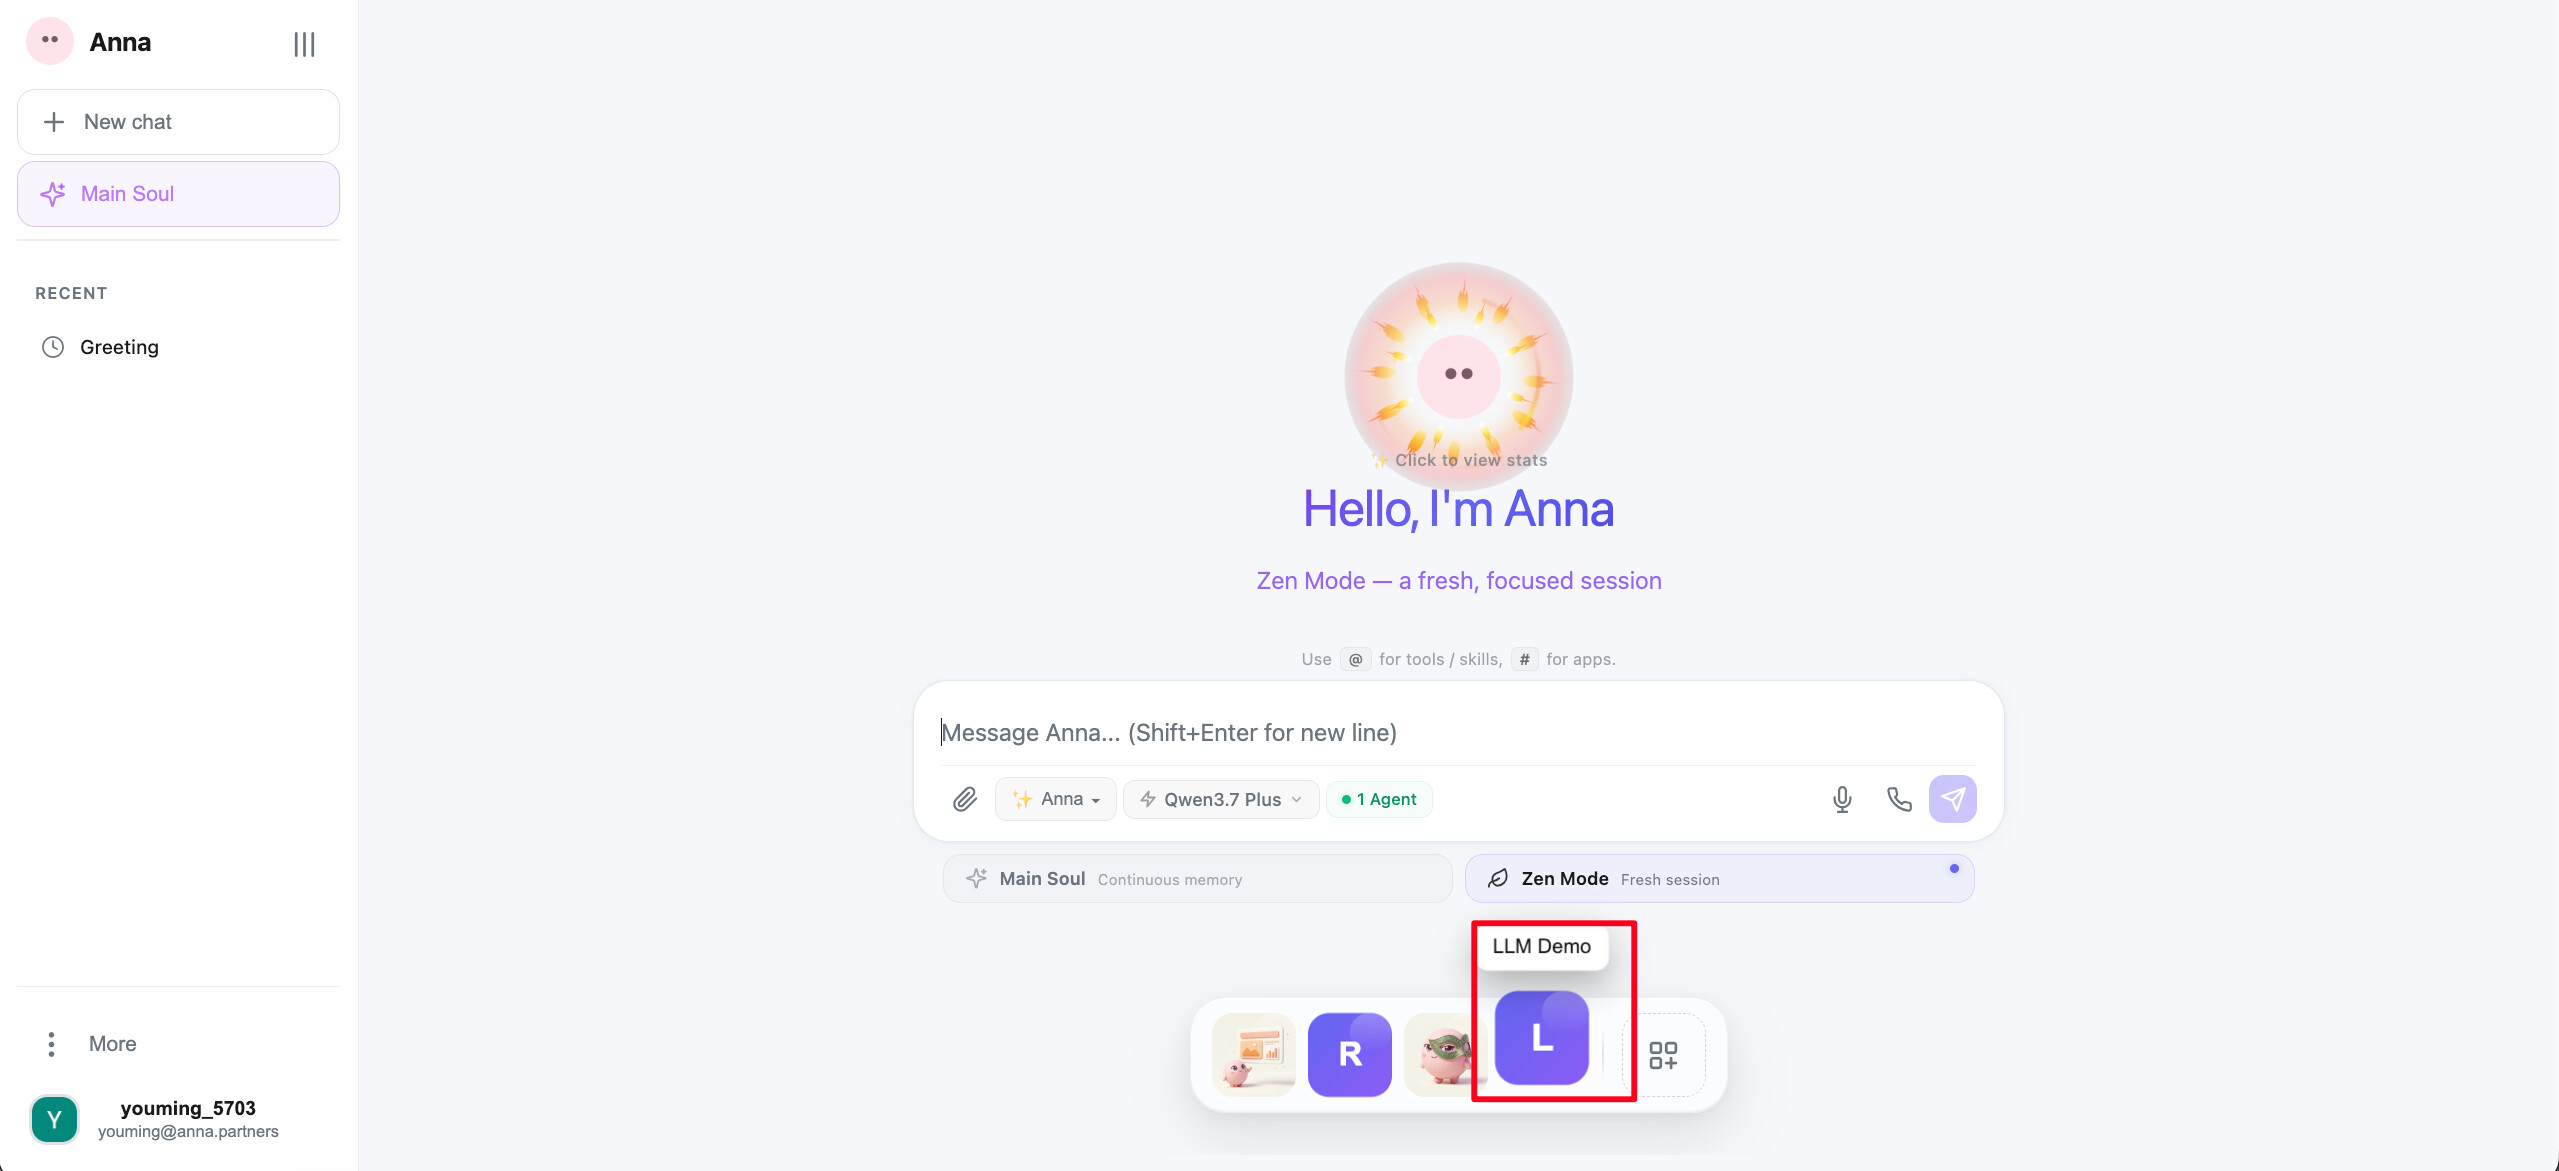
Now you can use this App on the platform.

Chapter Summary
In this chapter, we completed the first platform distribution of the LLM Demo:
anna-app apps push
It did two major things:
1. Register the bundled Executa Tool
   bundled:llm-via-executa
     |
     v
   tool-youming-llm-via-executa-yv49p6ce

2. Upload the App frontend and manifest
   bundle/ + manifest.json
     |
     v
   working draft
You should now understand:
-
A Tool is registered and distributed independently.
-
The App frontend UI is uploaded as a bundle.
-
apps pushcreates a working draft, not an official release. -
apps cutfreezes the draft into an immutable version. -
After publishing, users can install the App and configure permissions in Installed Apps.
Conclusion
That is the end of this quick-start guide for now.
Across these four chapters, we did not stay at the concept level. Instead, we followed the official example anna-app-llm-demo and walked through the main path that every Anna App beginner needs to understand:
-
Prepare the local development environment by installing Node.js,
uv, and@anna-ai/cli -
Log in to an Anna account so the local development environment can use real platform capabilities
-
Run the official LLM Demo locally
-
Break down the project structure and understand
app.json,manifest.json,bundle/, andexecutas/ -
Understand how an Anna App calls the LLM from the UI
-
Understand how a bundled Executa is registered and distributed as an independent Tool
-
Use
anna-app apps pushto push the App draft and frontend bundle to the Anna platform
If you have followed along to this point, you should no longer just see “an example that runs.” You should know why it runs: the App organizes the experience, the UI bundle provides the interface, the manifest declares runtime requirements and permissions, the Executa provides callable backend capabilities, and the Anna platform handles hosted LLM, distribution, installation, and permission management.
This is only the starting point. Anna Apps can be extended with many more capabilities, including Skill, Agent Session, Persistent Storage, file upload, image generation, multi-platform binary distribution, CI release workflows, and more. If you want to go deeper, I recommend reading the official example repository and developer documentation:
-
Official example repository: whtcjdtc2007/anna-executa-examples
-
Official developer documentation: https://staging.anna.partners/developers
I hope this article helps you get past the first hurdle of Anna App development. The next step is to try turning anna-app-llm-demo into your own first Anna App.